how to blend tow faces in Photoshop
Hi every one today i am going to show you how to blend tow faces in Photoshop.
First of all open the photos that you want to work with and follow the funny steps below.
let take Adele and Zara lesson
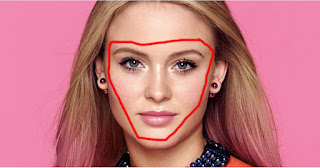
 First of all, you have to select the face that you want to make it on Adele's face . Select it by the POLYGONAL LASSO TOOL then remove it by the MOVE TOOL and put it on Adele's face .Enter "CTRL T" to make it smaller or bigger and turne the opacity down to see what behind the new face .
First of all open the photos that you want to work with and follow the funny steps below.
let take Adele and Zara lesson
 First of all, you have to select the face that you want to make it on Adele's face . Select it by the POLYGONAL LASSO TOOL then remove it by the MOVE TOOL and put it on Adele's face .Enter "CTRL T" to make it smaller or bigger and turne the opacity down to see what behind the new face .
After that go to IMAGE choose ADJUSTMENT and then MATCH COLOR tray to make the color of the face and the new face the same,then keep the selection and go to SELECT choose MODIFY then CONTRACT make it over 10 that will be okay with this image but you can change it as you want for another photo .
NOW go to the background layer and enter "CTRL J" make sure that the face is selected and go to the background copy and enter DELETE .After that select the copy layer the face layer and go to EDIT and choose AUTO-BLEND-LAYERS . choose PANORAMA and click on Seamless Tones and Color then click on OK .
And here it is ,
it looks really natural and real and this way should be very easy for very one .i find that it is very funny to blend tow faces like this . and of coures you can blend just the nose or the lips by following the same steps .
So , that is it for today i hope you enjoyed it and see you nest tutorial and "HAVE A NICE DAY"


Commentaires
Enregistrer un commentaire